> For the complete documentation index, see [llms.txt](https://omegatheme-contact.gitbook.io/omega-multi-twitter-pixels/llms.txt). Markdown versions of documentation pages are available by appending `.md` to page URLs; this page is available as [Markdown](https://omegatheme-contact.gitbook.io/omega-multi-twitter-pixels/twitter-x-conversion-api.md).
# Twitter/X Conversion API
No more missing events with Server-side tracking, bypass iOS 14.5 and ads blocker!
The Conversion API (CAPI) enables a direct **server-to-server** connection to share conversion data for **better measurement of ad campaigns**.
It enhances data control, complements the existing pixel, and can be used with or without pixel. CAPI allows **multiple data signals** (such as click ID, email, or IP address) to send conversion events for **more accurate tracking**.
{% hint style="info" %}
The Conversion API also enables tracking of offline conversion events, where conversions may begin online but conclude offline.
By leveraging an offline Conversion API solution, you can measure these offline conversions alongside your online ones, providing a complete view of campaign performance.
{% endhint %}
### 👉 FYI: [Conversion Tracking for Websites](https://business.x.com/en/help/campaign-measurement-and-analytics/conversion-tracking-for-websites)
## Step-by-step guide to turn on Twitter Conversion API:
Follow these 2 simple steps:
### Step 1: Turn on CAPI when setting up the pixel
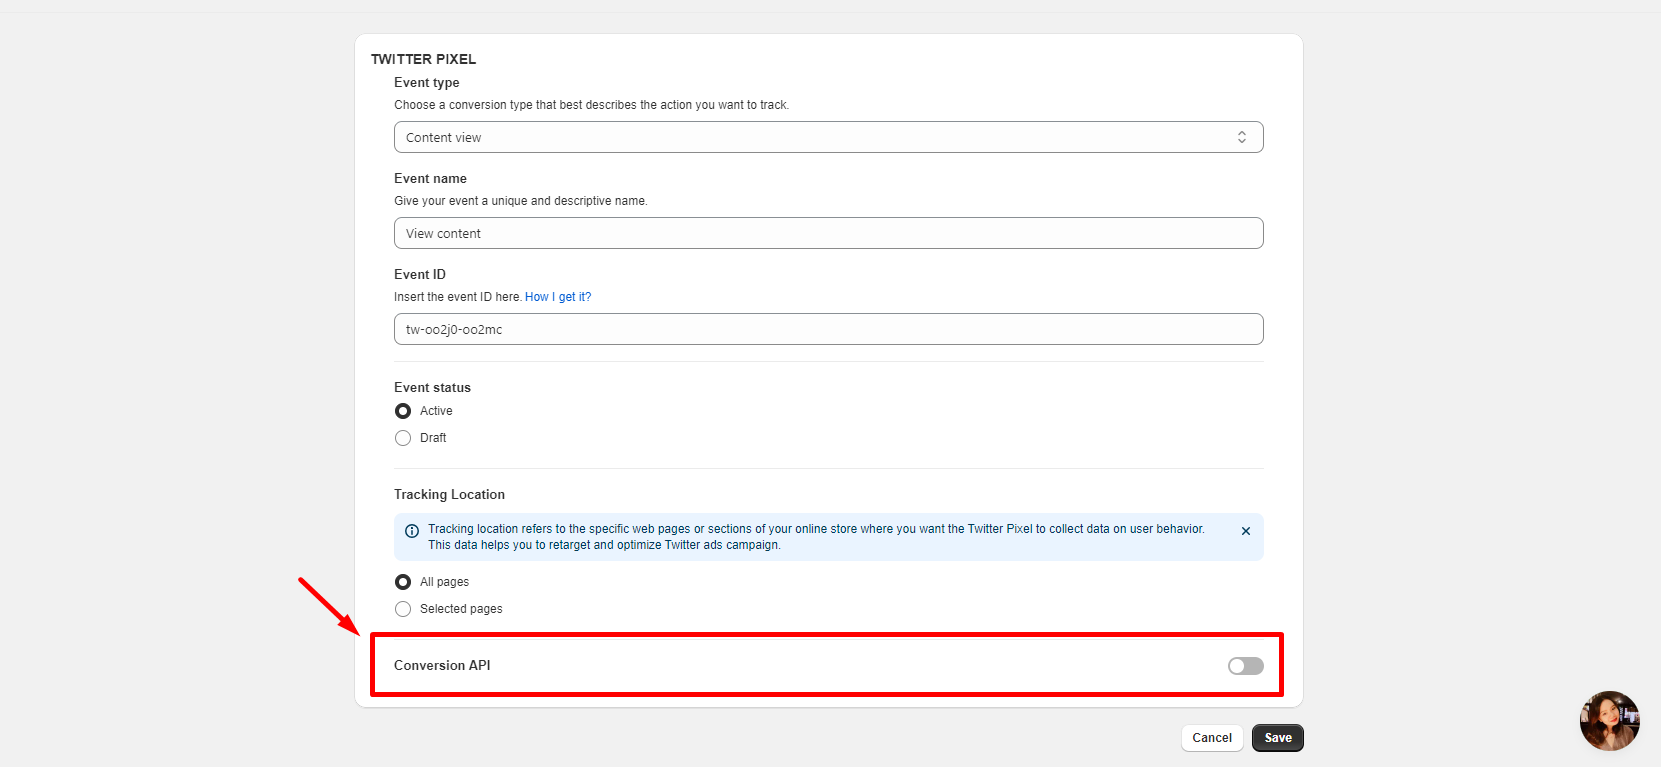
When adding pixel, there is an option to turn on Twitter Conversion API here. Turn on this toggle, additional UI elements related to the Conversion API will be displayed, allowing you to configure it.
### Step 2: Connect to Twitter Account
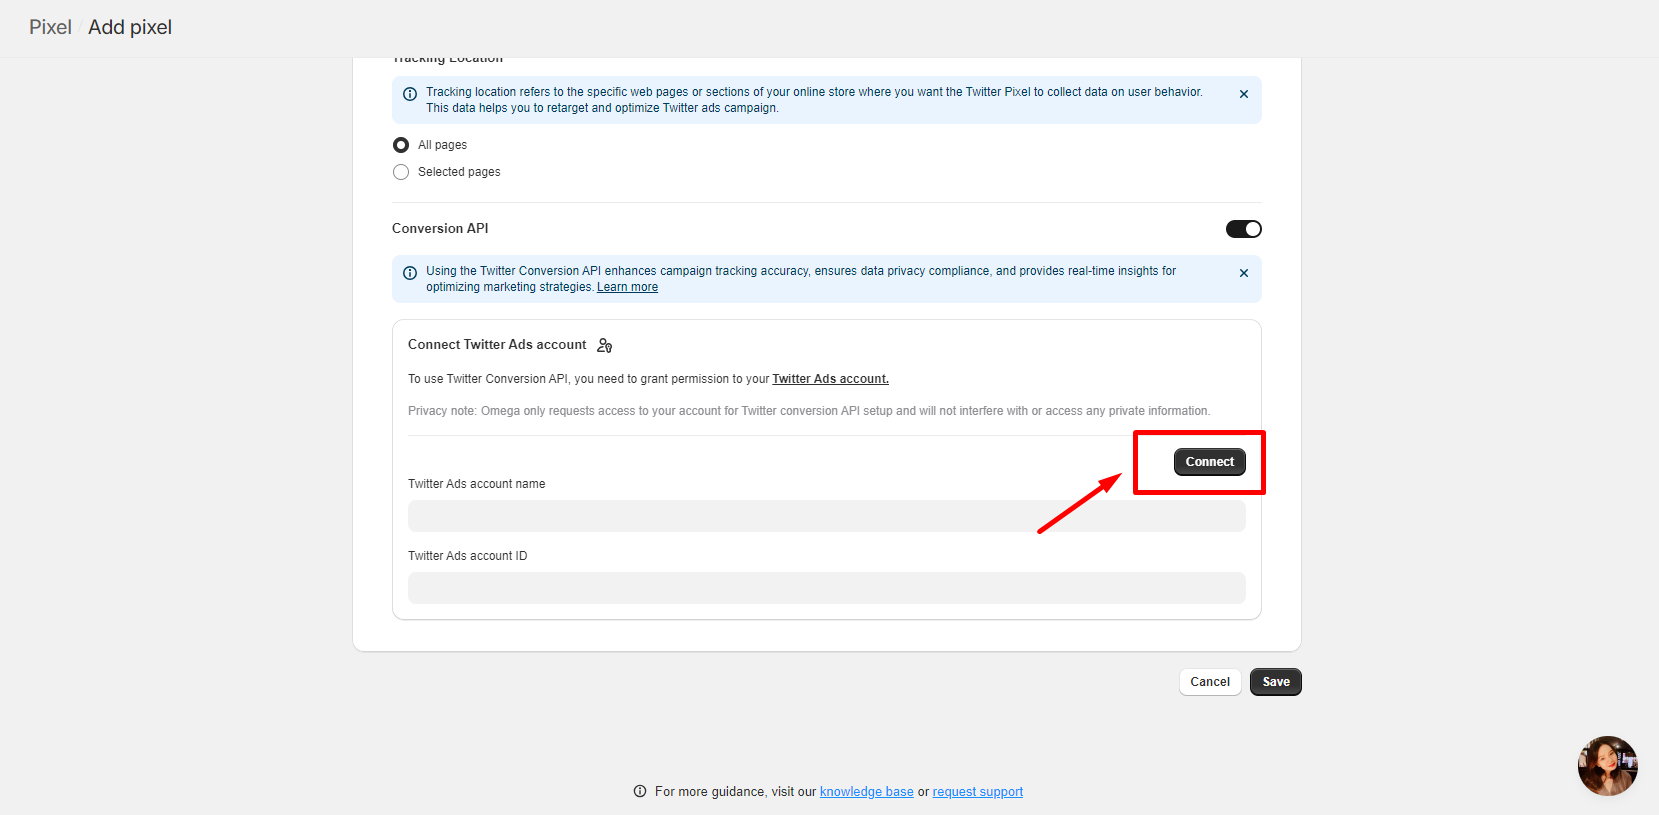
To use CAPI, just simply connect to your Twitter Account, then authorize permission to enable connection between Omega & your account:
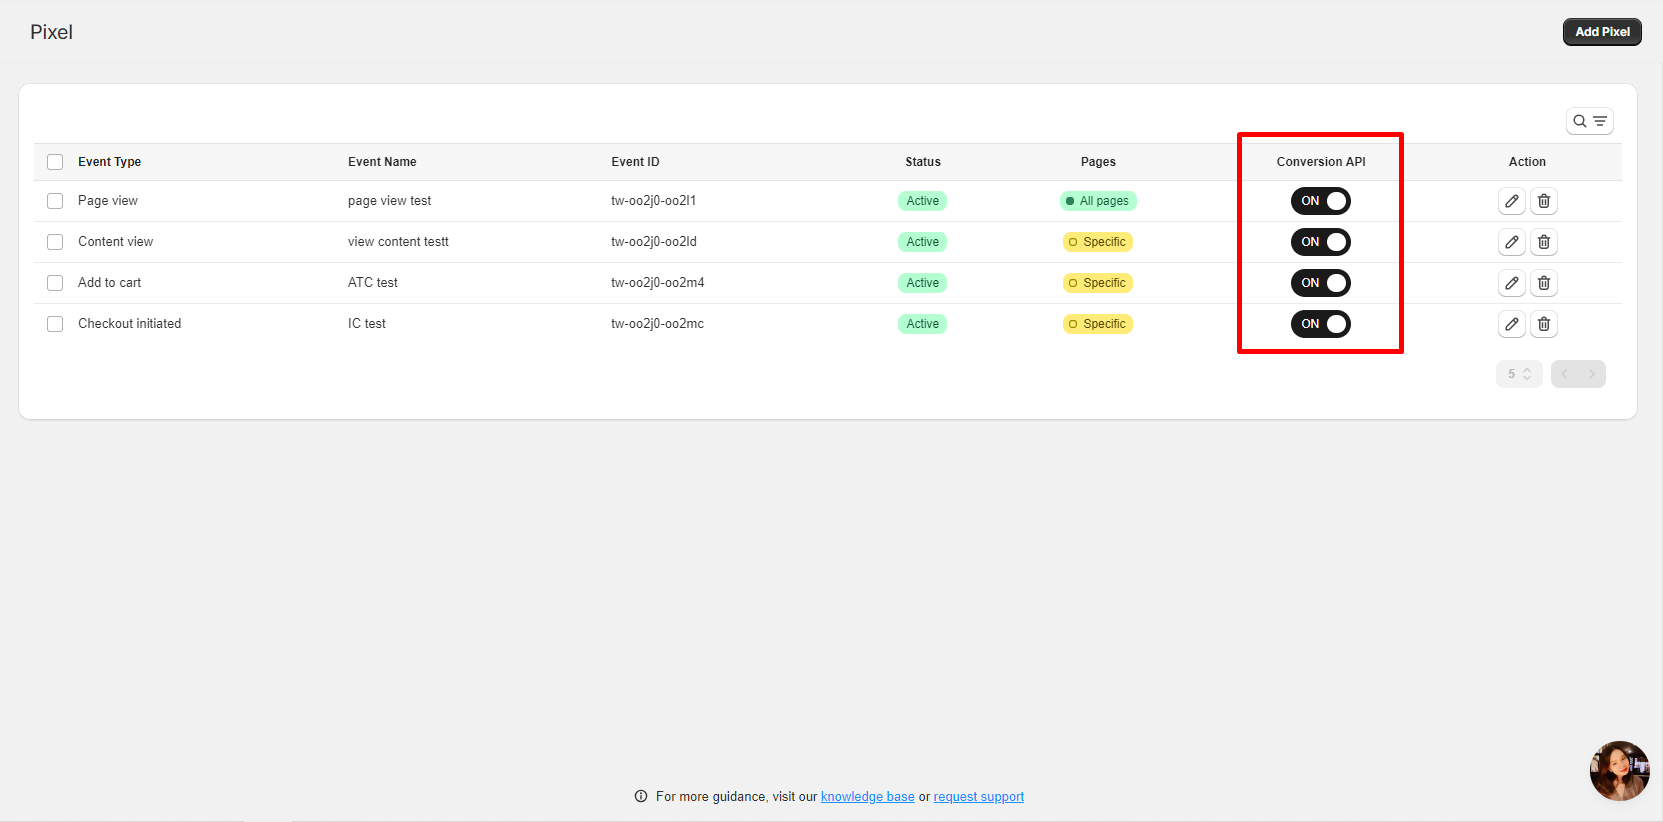
You can add multiple Twitter account & switch here to know which events are tracked with which account:
Upon setting up done, click Save then start tracking server-side events seamlessly 😎
When events recorded, your pixels will be shown **Active** right in your Events Manager:
## 😎How to notice server-side events on Twitter Events Manager?
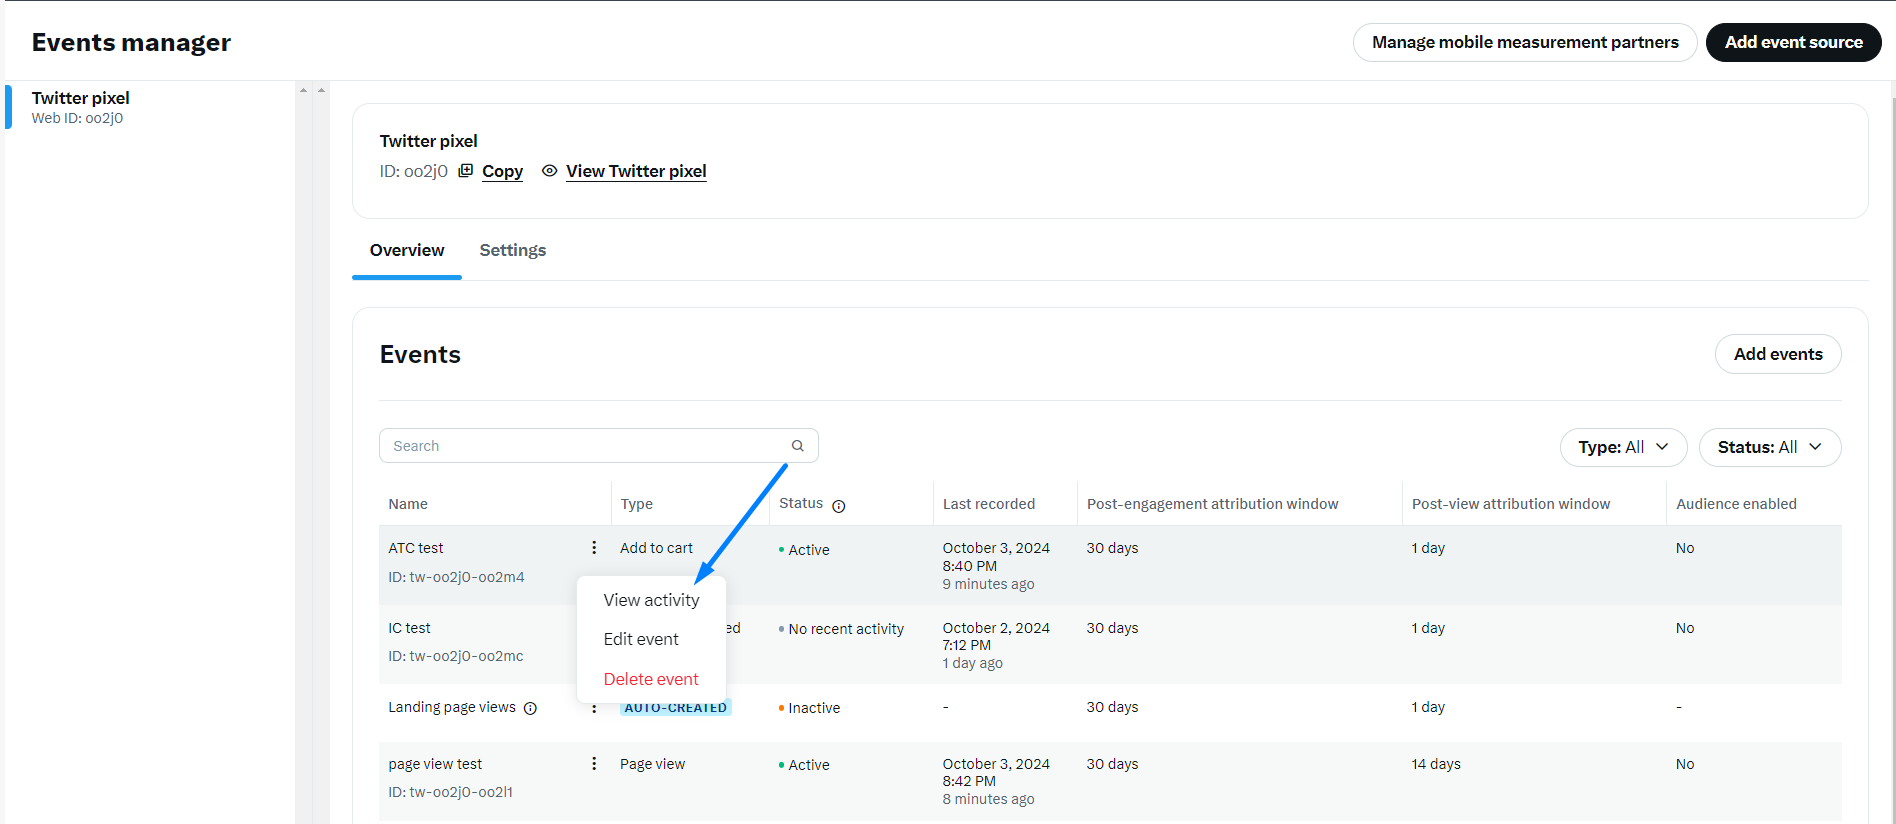
Go to your Twitter Events Manager, and select the event you want to check. Choose **View activity** here:
With Server-side tracking (Conversion API), it will help detect hidden domain that is not tracked by Twitter Pixel only as Pixel is limited by ads blocker and device limitations for privacy reasons.
So if you see no host appears (as in the image), that is the server-side event fired successfully by Omega:
## ❗❗ NOTE
1. Due to Shopify updates, **Purchase events** are **no longer visible in Twitter Pixel Helper**, but rest assured that you can still view them in Twitter Events Manager.
2. Please be noted that if you log out 1 Twitter account from Omega, pixels connected with this account will **STOP tracking Server-side events** from then.